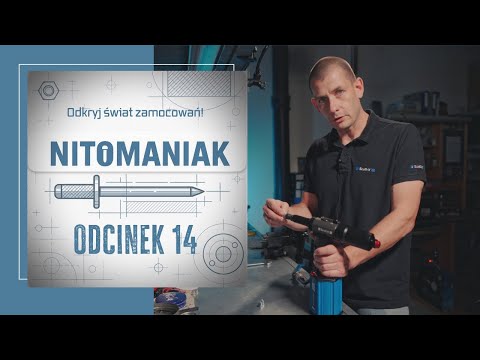
Rivet pneumatik-hidraulikScell-It
E-312NP


Data mesin
- Nama mesin:
- Rivet pneumatik-hidraulik
- Pengeluar:
- Scell-It
- Model:
- E-312NP
- Nombor mesin:
- L030748
- Tahun pembuatan:
- 2025
- Keadaan:
- seperti baru (mesin pameran)
- Fungsi:
- berfungsi sepenuhnya
- Jam operasi:
- 2 h
Harga & Lokasi
- Lokasi:
- Tarnowskie Góry, Poland
Butiran teknikal
- Berat keseluruhan:
- 2 kg
- Tempoh jaminan:
- 3 bulan
- Tekanan:
- 7 palang
Butiran tawaran
- ID iklan:
- A22109818
- Nombor rujukan:
- E-312NP
- Kemas kini:
- terakhir pada 12.06.2026
Penerangan
Nose/Mandrel Replacement:
Detailed instructions for replacing the nose and mandrel can be found in our comprehensive operating manual. If you intend to use self-clinching nuts of different diameters, it will be necessary to change the nose, mandrel, and adjust the tool accordingly. Consult the instructions to learn how to make these changes and adjust the mandrel length to the size of the self-clinching nut.
Iijdjzc Dx Iepfx Afrsc
Self-Clinching Nut Installation:
After performing the startup procedures and adjusting the stroke, insert the self-clinching nut into the pre-drilled hole.
Place the mandrel in the self-clinching nut and press the tool. The mandrel will automatically seat itself in the self-clinching nut.
Press the tool trigger to clamp the self-clinching nut onto the component.
The release will occur automatically after the self-clinching nut has been clamped onto the component, allowing you to release the tool.
If the tool is not released from the self-clinching nut, press the button on the back of the tool to force the release.
Stroke Adjustment:
The tool stroke must be adjusted to the component on which the self-clinching nut will be clamped. The E-312NP riveting tool allows stroke adjustment from 1 mm to 7 mm. To adjust it, follow the instructions below:
Precise stroke adjustment is crucial for effective self-clinching nut installation. Here are some tips for controlling stroke adjustment: The stroke can be set from 1 mm to 7 mm. The graduated scale on the tool accurately indicates the set stroke. To increase the stroke, move the adjustment slider towards the front of the tool, while simultaneously turning the knob to the left. Then release the slider, ensuring that it is re-seated on the head. The cursor will indicate the range of the set stroke. To decrease the stroke, follow the same procedure, turning the stroke adjustment knob to the right. Our self-clinching nut riveting tool is designed to allow precise stroke adjustment and ensure optimal installation results.
If the stroke is incorrectly adjusted or the self-clinching nut has a quality defect, the mandrel release may be difficult. In this case, use the "anti-block rod," which is included in the kit. Insert it into the hole in the base of the sleeve and turn it to the right to release the self-clinching nut, as shown in the illustration in the manual.
Iklan ini diterjemahkan secara automatik. Mungkin terdapat kesilapan terjemahan.
Pembekal
Didaftarkan sejak: 2026
5 Iklan dalam talian
Hantar permintaan
Telefon & Faks

Machineseeker-tanda kepercayaan
Apakah itu sijil kepercayaan?
Machineseeker mensertifikatkan peniaga terpilih dengan meterai kepercayaan Machineseeker. Sebelum pemberian, pemeriksaan yang distandardisasi dan menyeluruh dilakukan oleh staf berpengalaman Machineseeker.
Apa yang kami periksa?

Pemeriksaan
lesen perniagaan atau ekstrak daftar perniagaan
Pemeriksaan
alamat pos penjual
Pengesahan
sambungan bank
Pengesahan
kebolehcapaian telefon
untuk nombor utama
Maklumat ekonomi
tidak boleh mengandungi ciri-ciri negatif
Aduan pembeli
boleh menyebabkan penarikan semula sijilApakah maksudnya ini bagi anda sebagai pembeli?
Melalui cop kepercayaan Machineseeker, anda sebagai pembeli dapat mengenal pasti peniaga yang dipercayai tanpa pemeriksaan sendiri yang sangat berkemungkinan menjalankan perniagaan secara jujur dan beretika.
Sudah tentu, semasa proses pembelian, perbezaan pendapat masih boleh berlaku. Machineseeker tidak bertanggungjawab terhadap pelanggaran undang-undang oleh pembeli atau penjual yang aktif di Machineseeker.